Patterns

Red Redux

Knit scarf pattern for man

Knit scarf pattern for man

The last men's scarf pattern I wrote elicited elicited some envy, so I made another. It's a nice texture that's fast and easy to knit up. The big needles, bulkier yarn and easy to memorize pattern make this a good pattern for beginners.

Red Redux

Materials

3 skeins Plymouth Chunky Merino Superwash Color 18 (100 gr, 109 yards; 100% merino wool)

US size 10 14″ needles

Tapestry needle and scissors

Notes

The scarf is 8" wide, which is pretty wide. If you'd prefer a narrower scarf, you can reduce the width by 4 stitch increments.

K- knit

P – purl

Left Twist - (LT) - knit into the second stitch, then knit into the first, slip both stitches off the needle

Cable cast on description

mens scarf knitting pattern

mens scarf knitting pattern

Directions

Setup

Cable cast on 34 sts.

Knit three rows.

Pattern

  • Row 1: K3, *p2, LT* Repeat from * to * until final 3 sts, k3.

  • Row 2: K3, *p2, k2* Repeat from * to * until final 3 sts, k3.

  • Rows 3 & 4: Repeat rows 1 & 2

  • Row 5: K to end

  • Row 6: K3, p to final 3 sts, k3

  • Row 7: K3, *LT, p2* Repeat from * to * until final 3 sts, k3.

  • Row 8: K3, *k2, p2* Repeat from * to * until final 3 sts, k3.

  • Rows 9 & 10: Repeat rows 7 & 8

  • Rows 11 & 12: Repeat rows 5 & 6

Repeat pattern until scarf measures 60″, or you run low on yarn.

Knit three rows.

Scarf texture

Scarf texture

Men's Scarf Pattern

Men's Scarf Pattern

I like to pretend that I'm a selfish knitter, meaning I only knit for the 'knit-worthy' - those that would both help you move a body and truly understand the craft and time and love that go into hand-knits (and quilts, for that matter). The idea rose as a backlash against that jerk acting like they are doing you a favor by requesting that you make them something and that other jerk that informs you that you can buy socks already made at Walmart. Very helpful.

[img:1]

I lack the discipline to be 'selfish' and instead foist projects that took me days, weeks, months on completely unsuspecting people. The obvious amount of energy that goes into the projects lays there like threat - reject this and you reject me. It's gift-giving emotional one-upping. "Oh, it's no big deal. I just spent 30 hours working on this, stitch by stitch. Thinking about what you'd like. Fretting that you wouldn't want this. Reflecting on how you're important in my life. Nothing major. It's no Best Buy gift card or anything."

It's a bit unfair, really, because even I would rather get the Best Buy gift card. My interest in wearing the things I make dies about four days after I complete them. Perhaps, the truly selfish approach is to leach inspiration from those around me, so I can induldge in a hobby I enjoy while pretending I'm giving a one-of-a-kind masterpiece that will be cherished for decades.

This emotional bombing is not too dissimilar, in fact, from foisting my navel-gazing posts upon readers just coming here for free scarf pattern to knit for a man in their life (or lady, I suppose). So, with only a little more adieu, here we go -

This pattern was the request of an old friend to replace a scarf I'd made him years and years ago, when I'd just started knitting/crocheting. I have always been a little 'meh' about that scarf (though apparently he loved it - always a sign of the knit-worthy) so I jumped on this as an opportunity to redeem myself. His request was "long, dark red and textured". It all fell into place from there. Red yarn that just happened to be named "Pagoda" when he'd just so happened to spend some time in China and a stitch pattern that just so happened to look like roof tops, and here we are - Mao's Little Red Scarf.

This pattern is ridiculously easy and a pretty quick knit for a scarf. You need to know how to knit, purl, cast on and cast off, so it is very beginner friendly. 

Mao's Little Red Scarf Pattern

[img:2]

Materials

2 skeins Malabrigo Worsted weight in Pagoda (100 gr, 210 yards; 100% merino wool)

US size 8 14" needles

Tapestry needle and scissors

Stitch marker

Notes

K- knit

P - purl

PU - pick up strand from 2 rows down and slip it over the next live stitch. (You don't work this stitch. It is held into a point by the live stitches)

Cable cast on description

Directions

Setup

Cable cast on 35 sts. 

Knit five rows.

Pattern

  1. *K3, slip next 5 sts with yarn in front*, repeat from * to * until last 3 sts, k3.
  2. *K3, p5*, repeat from * to * until last 3 sts, k3.
  3. K5, *pu, k8, repeat from * to * until last 6 sts, pu, k6.
  4. *K3, p5*, repeat from * to * until last 3 sts, k3.

Repeat pattern until scarf measures 60" or length desired.

K 5 rows.

Bind off and weave in ends.

Optional: Ship to Asia.

[img:3]


Pucker Up Cowl Free Knitting Pattern

Materials

1 skein Cascade Yarn Rustic (79% Wool, 21% Linen) 100gr, 196 yds

32" size 7 circular needles

Tapestry needle and scissors

Stitch marker

Notes

Make pucker: Pick up stitch from 10 rows below and knit together with one stitch on the left needle.

Seed stitch: K1, p1 for the whole round. (On the second round, you'll knit into purl stitches, and purl into knit).

Slip marker as you come to it.

Cable cast on description

Directions

Setup

Cable cast on 125 sts. Join, being sure not to twist.Place marker to note start of round.

Work 1 inch in seed stitch.

Knit 10 rounds.

[img:1]

Lotus Baby Blanket Pattern

Lotus Baby Blanket Pattern

I need to get rid of yarn. 

A lot of it is left overs from other projects - too much to toss, too little to make anything - or stuff that has been given to me. Nice and thank you, but not what I'd have bought. Also, yarn follows the same rules as Chinese food - left overs are either consumed in the first two days, or you lose the ability to see them. The get pushed further and further to the back, until in a flurry of Spring cleaning you come across a container you're afraid to open.

It's making me crazy. I feel guilty buying new stuff I'd actually use because I have approximately 8 sheep in my closet. And it just sits there. Staring.

So I made a blanket to cover my shame.

[img:1]

This yarn was a lovely cotton/alpaca blend that someone cruely dyed the color of blanched salmon. I believe my mother had a sweater in exactly this color somewhere around 1993. I used it to make a baby blanket. Being pre-verbal, babies' opinions on color pallet are easily ignored. But to appease their now-talking parents, I plan to dye it 'flamingo'.

[img:2]

This blanket is a pretty quick knit. All the confusing stuff is right at the beginning, so starting over/frogging (not that anyone ever does...) isn't too painful. The petal pattern is easily memorized and doesn't take much concentration after you figure it out. This probably isn't the best pattern for your first lace project, it would make a great second one. 

Lotus Knit Baby Blanket Pattern

Size

32"x32"

Gauge

18 sts x 20 rows = 4 inches in stockinette

Materials

  • 300 grams (3 skeins) Cascasde 220 wool or similar worsted weight yarn (100 grams, 220 yards) 
  • Size 8 (5 mm) 32” circular needles
  • Size 8 (5mm) 60" circular needles
  • Darning needle

Abbreviations

  • K – Knit
  • P – Purl
  • K2tog – knit 2 together
  • Ssk – Slip 2 stitches knitwise and k2tog
  • Sl, k2tog, psso – Slip on st to the right needle, k2tog, pass slip stitch over
  • K1f&b - Knit 1 in the front and back of the stitch
  • K tbl - Knit through back loop
  • YO - Yarn over
  • PM - Place marker

Notes

Throughout pattern, slip markers as you come to them.

Switch to longer circulars when needed.

This blanket is knit using the magic loop method.

Directions

Cast on 8 sts using the disappearing loop method. Pull the cable through so you have 4 sts on each needle.

Center Flower

Work the following pattern four times on each round.Place a marker between each repeat.

  1. K, 2yo, k
  2. K2, p, k
  3. K2, yo, k2
  4. K2, k1f&b, k2
  5. K2, yo, k2, yo, k2
  6. Knit
  7. K2, yo, k4, yo, k2
  8. K3, k2tog, ssk, k3 
  9. Yo, k2, yo, k2, yo, k2, yo, k2
  10. K3, k2tog, k1, k1f&b, k1, ssk, k2
  11. K tbl, yo, k2, yo, k1, yo, k2tog, ssk, yo, k1, yo, k2, yo
  12. K4, yo, k2tog, k2tog, yo, ssk, ssk, yo, k3
  13. K tbl, yo, k1, yo, k3, yo, k2, k1f&b, k2, yo, k3, yo, k1, yo
  14. K8, yo, ssk, ssk, k2tog, k2tog, yo, k5
  15. K tbl, yo, k3, yo, k1, ssk, k1, sl1, k3tog, psso, k1, k2tog, k1, yo, k3, yo
  16. Knit
  17. K tbl, yo, ssk, k1, k2tog, yo, k7, yo, ssk, k1, k2tog, yo
  18. Knit
  19. K tbl, yo, k5, yo, ssk, k3, k2tog, yo, k5, yo
  20. Knit
  21. K tbl, yo, k7, yo, ssk, k1, k2tog, yo, k7, yo
  22. Knit
  23. K tbl, yo, k9, yo, sl1, k2tog, psso, yo, k9, yo
  24. Knit
  25. K tbl, yo, k11, yo, ssk, k10, yo
  26. Knit


Petals

Work the following pattern between each marker.

  1. Ktbl, *yo, k tbl, yo, ssk, k7, k2tog* Repeat from * to * until 1 st before marker, yo, k tbl, yo, slip marker.
  2. Knit
  3. Ktbl, *yo, k3, yo, ssk, k5, k2tog* Repeat from * to * until 3 sts before marker, yo, k3, yo, slip marker.
  4. Knit
  5. Ktbl, *yo, ssk, k1, k2tog, yo, k7* Repeat from * to * until 5 sts before marker, yo, ssk, k1, k2tog, yo, slip marker.
  6. Knit
  7. Ktbl, *yo, k5, yo, ssk, k3, k2tog* Repeat from * to * until 5 sts before marker, yo, k5, yo, slip marker.
  8. Knit
  9. Ktbl, *yo, k7, yo, ssk, k1, k2tog* Repeat from * to * until 7 sts before marker, yo, k7, yo, slip marker.
  10. Knit 
  11. Ktbl, *yo, k9, yo, sl1, k2tog, psso* Repeat from * to * until 9 sts before marker, yo, k9, yo, slip marker.
  12. Knit 
  13. Ktbl, yo, k11, *yo, ssk, k10* Repeat from * to * until marker, yo, slip marker.
  14. Knit 

Repeat the petals pattern 4 more times, for a total of 5 repeats.

Outer Edge

  • Increase round: Ktbl, yo, k until marker, yo, slip marker.
  • Even round: Knit

Alternate increase and even round for ten total rounds. Work 5 additional rounds in seed stitch.

  • Seed stitch increase: Ktbl, yo, *k, p* repeat from * to * until marker, yo, slip marker.
  • Seed stitch even round: P, k around.

Cast off loosely in pattern.

[Img:3]

Edited 3/16/2011 - Fixed error in line 7 and 13 of flower pattern.
Edited 3/17/2011 - Couple more.
Edited 3/20 - Dyed.
Edited 3/27 - Couple tweaks
Edited 3/31 - Row 15 will be the death of me.

[img:4]

Men's Cabled Hat Pattern

Men's Cabled Hat Pattern

With how brutally cold it's been, it's depressing to think we are just a month into winter. It seems like Kansasians have given into the permanence of the cold. Random comments about how 'nice' it is outside can be overheard when the thermometer inches above the 20 degree mark.  It's possible the lack of sun has made us delirious.

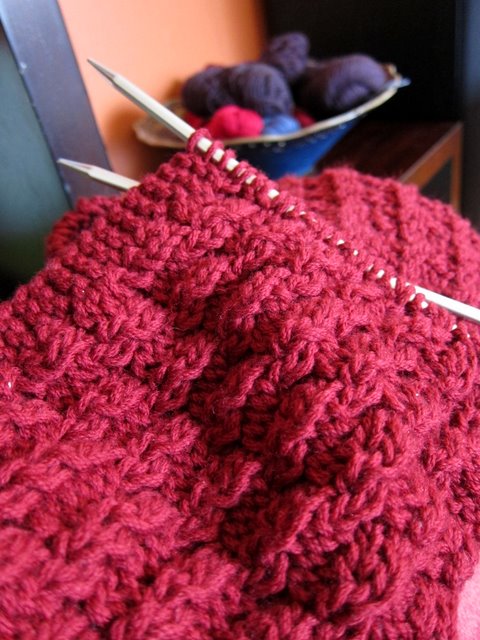
Needless to say, it is time for heavy duty knit ware. Lace and silk are nice and all, but these balmy 5 degree days demand wool and cables. Designed the below for the fella. I wanted a guy-friendly design that wasn't just ribbing and a rolled up cuff so he can double up on his ears. I really love the outcome, and it was a really fast knit (2 days of fairly regular knitting).

[img:1]

Men's Cabled Hat Pattern

Size

Adult Women's/Men's

Gauge

18 sts = 4 inches in stockinette

Materials

  • One skein (4 oz, 190 yards) Lamb's Pride Worsted weight. 85% wool, 15% mohair
  • Size 8 (5 mm) 32” circular needles for magic loop method or DPNs, depending upon preference
  • Cable Needle
  • Darning needle

Abbreviations

K – Knit

P – Purl

K2tog – knit 2 together

Ssk – Slip 2 stitches knitwise and k2tog

Sl, k2tog, psso – Slip on st to the right needle, k2tog, pass slip stitch over

CL – Cable Left – Slip 3 sts to cable needle, hold to front, k3 from left needle, k3 from cable needle

CR – Cable Right – Slip 3 sts to cable needle, hold to back, k3 from left needle, k3 from cable needle

Directions

Cable cast on 80 (90) sts

Ribbing

*P2 (3), k3, p2 (3), k3, p3, k3* Repeat from * to * around until ribbing measures 2.5 (3) inches.

Body of Hat

Work the following pattern three times

  • Work 6 (7) rows of *P2 (3), k3, p2 (3), k9* Repeat from * to * to end of round.

  • *P2 (3), k3, p2 (3), CR, k3* Repeat from * to * to end of round.

  • Work 6 (7) rows of *P2 (3), k3, p2 (3), k9* Repeat from * to * to end of round.

  • *P2 (3), k3, p2 (3), k3, CL* Repeat from * to * to end of round.

Men's only. Work the final round of the last repeat as:

  • *P2, ssk, k1, k2tog, p2, k3, CL* Repeat from * to * to end of round.

[img:2]

Crown

*P2, k3, p2, ssk, k5, k2tog* Repeat from * to * to end of round.

*P2, k3, p2, k7* Repeat from * to * to end of round.

*P2, k3, p2, ssk, k3, k2tog* Repeat from * to * to end of round.

*P2, k3, p2, k5* Repeat from * to * to end of round.

*P1, ssk, k1, k2tog, p1, k5* Repeat from * to * to end of round.

*P1, k3, p1, k5* Repeat from * to * to end of round.

*P1, k3, p1, ssk, k1, k2tog* Repeat from * to * to end of round.

*P1, k3* Repeat from * to * to end of round.

*P1, k3, p1, sl1, k2tog, psso* Repeat from * to * to end of round.

*P1, k3, p1, k1* Repeat from * to * to end of round.

*P1, sl1, k2tog, psso, p1, k1* Repeat from * to * to end of round.

*P1, k1* Repeat from * to * to end of round.

Ssk around.

Cut yarn and pull end through remaining sts.

Weave in ends.

[img:3]


Edited 1/24/11 to correct ribbing and final round before crown.
Edited 3/28/11 to change k3 to k1 on 7th round of crown.
Edited 4/11 to add note about magic loop

Scrap Quilt Pattern

In economics, externalities are the unintended side effects of industry. Similarly, this quilt is the side effect of many of the other quilts I've made. I always buy more fabric than I think I'll need, so I thought it was time to turn the left overs into some thing more awesome.

This quilt is a good way to use up scraps. Each color strip uses only a 3" strip of the width of the fabric. It's a quick and easy quilt, but still interesting.

If you're interested in making other sizes, it should be simple to scale up. If you'd like help, let me know. I'm happy to do it, if there is interest.

[img:1]

Externality Quilt

Finished size

36"x48" - a bit smaller than crib size

Supplies

  • Eight sets of twelve 3" blocks
  • 2/3rd white (or contrast) fabric, cut into eight 3" x width of fabric strips
  • 56" x 80" Batting - I doubled the batting to make the quilt extra fluffy. A precut twin size piece is large enough.
  • Backing fabric - 1 1/3rd yards
  • 1/3rd yard for binding
  • Yarn for tieing
  • Thread and other common quilting notions

Top of the Quilt

For each two row set of one color, you will need one strip that is 3" by the width of the fabric. Since this quilt is meant to use scraps, you might not have strips that are the full width of the fabric. This is no big deal, it will just require more cutting.

  • If you have a 3" x width of fabric strip, grab one of the strips of white. Sew the two strips together along the long edge. Press seam toward the color. Cut this down to twelve 3" x 5.5" pieces.
  • If you do not, cut twelve 3" blocks from the scraps that you do have. From the white, cut down a strip to 3" blocks. Sew one color block to one white block. Press seam toward the color

Continue until you have ninety-six 3" x 5.5" blocks with color on one side, white on the other. For each color, chain together six of these blocks. Press the seams toward the color. You now have sixteen strips of twelve squares (alternating color and white) which can be paired by color.

For each color pair, prepare to sew them together so that the color and white alternate. Take the time to pin and line up the seams. How well your seems line up can make or break this quilt.

[img:2]

One you have sewn together the pairs of strips, lay the strips out to determine what order you would like the colors to appear in. Pin and sew together the strips until the top is together. Press the seams open.

[img:3]

Finishing

I wanted the quilt to be extra fluffy, so I doubled up the batting. Tie in the middle of the white blocks.

Bind your new quilt

[img:4]