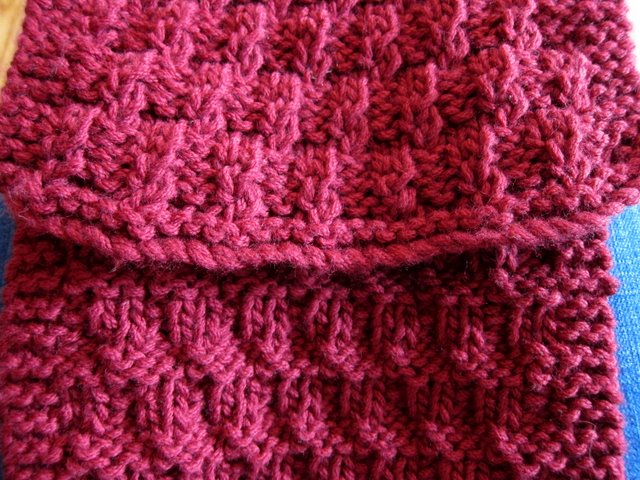
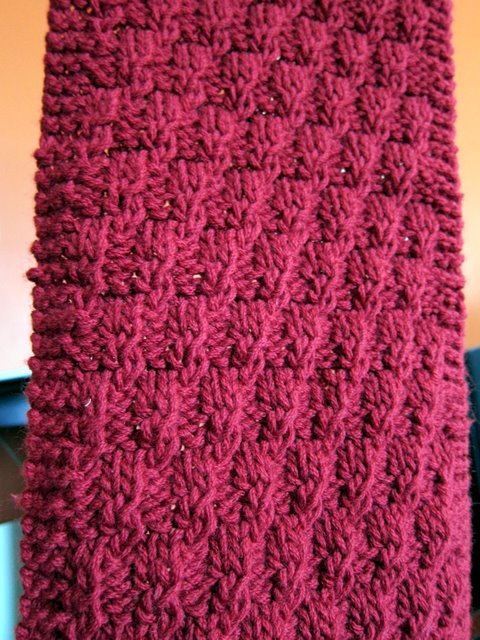
Jericho Knit Baby Blanket

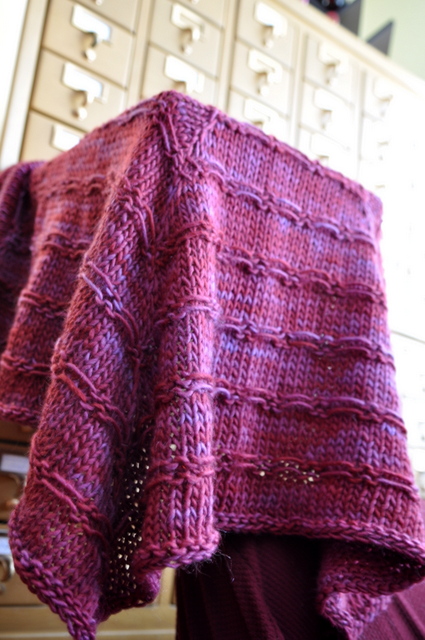
My four year old niece and 6-month nephew will staying with me and the fella for a week or so starting Friday. I have been stocking up on ideas to make me the best stay at home aunt ever. I have enough to last through day 2. After that: television. Aunts can get away with that. I'd designed this blanket to use up some yarn I've had laying around since 2009, and decided to name it after the impending invasion. Seven days running around a city and then shouting loud enough to knock down city walls? That sounds about right.

This photo was taken on a peaceful morning. So much for those.

This blanket uses the same start in the center and work your way out construction as my lotus and stripe seven baby blankets. I love this construction because you it's very forgiving if you're off gauge or are unsure about the amount of yarn you have. You just start knitting and bind off when you start running low or are sick of working on it.

Just enough to keep it interesting.

This blanket knit up SUPER fast. Size 11's, chunky yarn, and almost all knit stitches. I think it took me all of a week from start to finish.

Those lines of "walls" remind me just a bit of the noise emanating from a temperamental 4 year old.

I'm experimenting with new software, so I actually put this into a PDF. Lucky you!

Download Jericho Baby Blanket Knitting Pattern

Baby Season

baby-boy-closeup1.jpg

I'm waiting for science to prove that children, like tomatoes and trashy television, come in seasons. Friends, family and coworkers are bringing home bundles of joy left and right, and here is another welcome quilt.  Despite doing more quilting in the last few months than in the prior year, this officially puts the baby gift stockpile at one quilt. It's possible my friends like each other too much. I tend to be more attracted to color and texture, rather than than cute prints. If anyone asks, it's because I'm too classy for the cutesy prints, and not at all because my brain shorts out when I look at a pile of combating colors, shapes, and sizes.

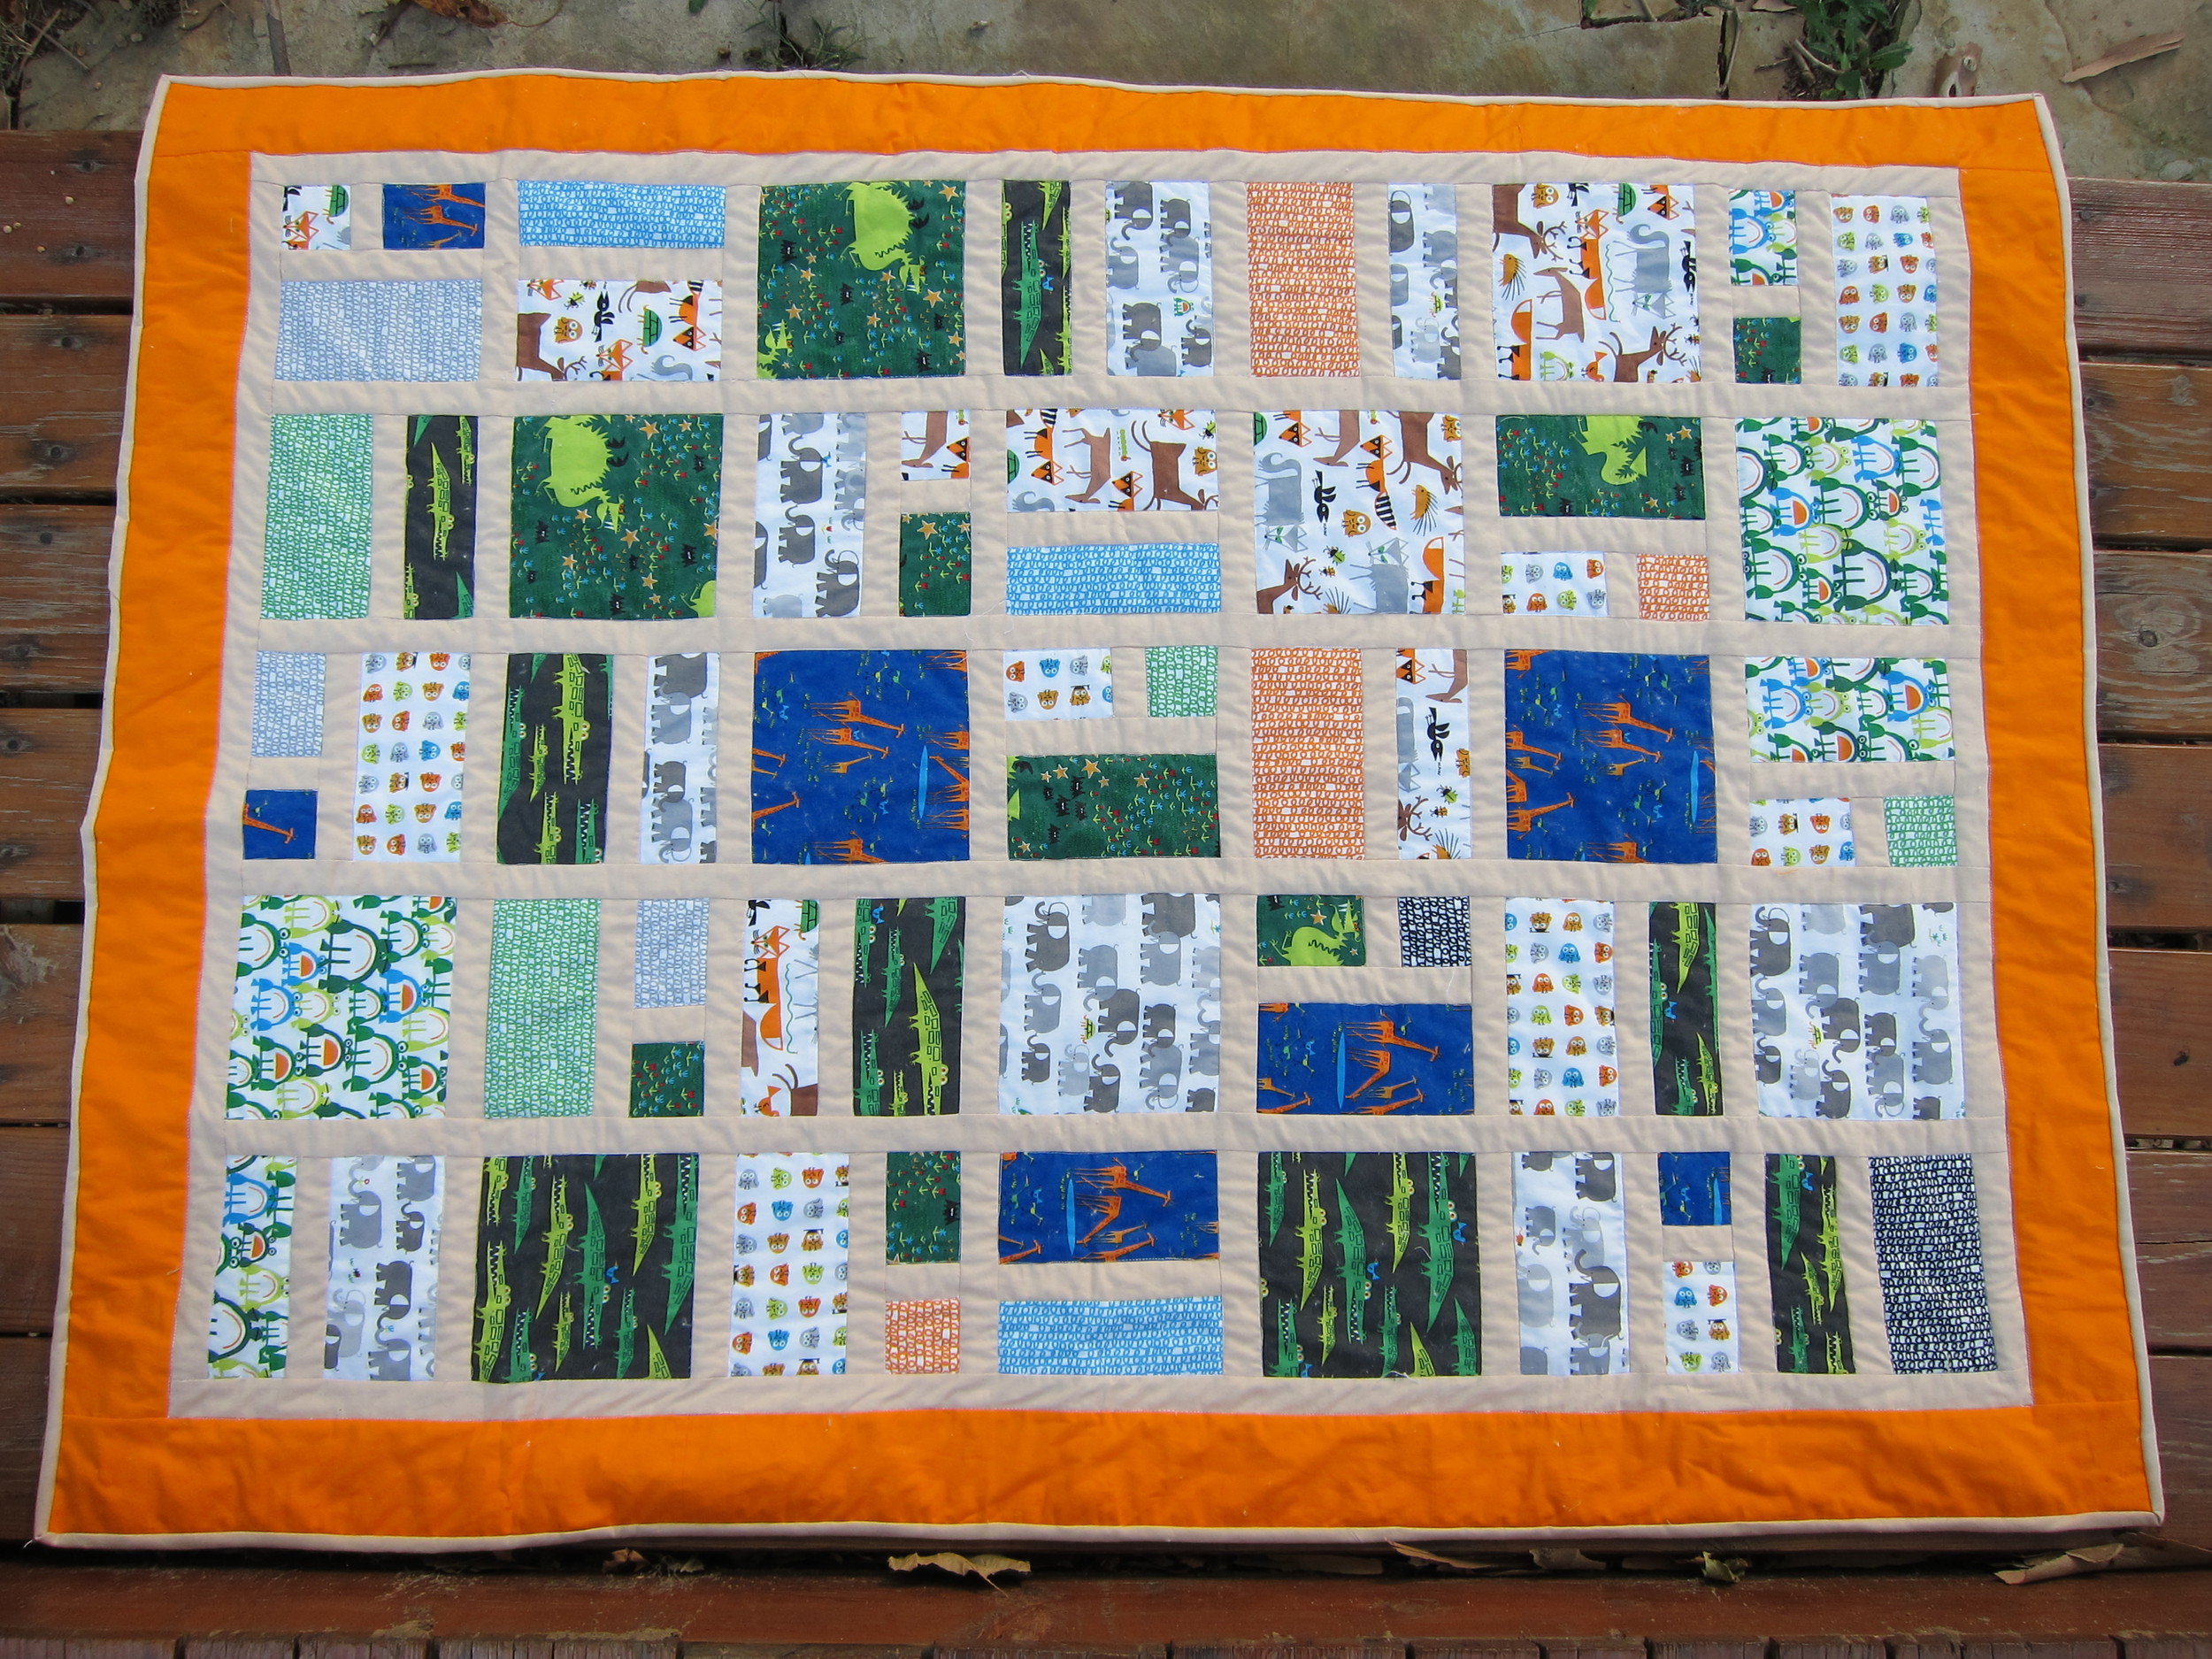
But Ed Emberley's "Happy Drawings" collection is too ridiculously little boy to pass on. Alligators, elephants and dragons. Random, sure, but so are boys. The patterns cover a range of sizes and tones, so putting together a design that would let each fabric sing was a bit of a challenge.

The end result is below. I'm pretty pumped. I think it's nephew-worthy.

Boy baby quilt

You will notice that this quilt is hopelessly nameless. A girl only has so much creativity, people. "Sapphires and Rubies" depleted my already parched well. So the good people over at FaveQuilts.com are having a little fun with it, and asking their readers to come up with name in their next newsletter. Have a clever suggestion to add? Leave it in the comments below.  

Edit 7/23: We have a name! Thanks everyone for voting.

Off to the Zoo Baby Quilt

Finished size: 32"x54"

Supplies

  • 1 yard sashing fabric
  • Fat Quarters or scrap fabrics. At minimum, you need five fat quarters, but you can use as many fabrics as you would like.
  • Backing fabric (I pieced my back from scraps)
  • 3/8 yard binding fabric
  • Batting and other quilting notions

Cut

From the fat quarters or scrap fabric, cut the following:

  • 12 - 6.5" squares
  • 12 - 2.5"x6.5"
  • 24 - 3.5"x6.5"
  • 12 - 2.5"x3.5"
  • 12 - 2.5" squares

From the sashing fabric, cut the following:

  • 67 - 1.5"x6.5"
  • 12 - 1.5"x2.5"
  • 8 - 1.5"x49" (if you are using 40" width fabric, you will need to piece these)

Piece Blocks

Sew 12 of each block type. You should have one left over when you layout the quilt top.

Block A

  • Sew the 1.5"x6.5" sashing to the top of the 6.5" squares
  • Press seam toward darker fabric

Block B

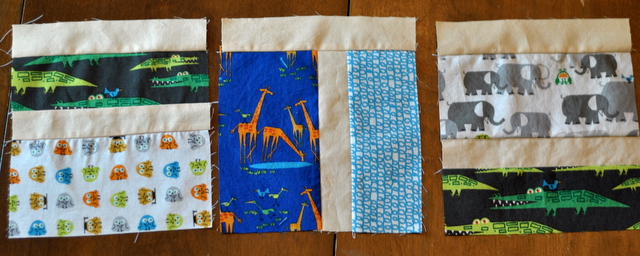
For blocks B and C, you can change the orientation of the rectangles in order to accommodate the pattern direction and to add more variety.

block B

  •  Sew the 1.5"x6.5" sashing to the side of the 3.5"x6.5" rectangle
  • Press seam toward darker fabric
  • Sew the 2.5"x6.5" rectangle to the other side of the sashing
  • Sew the 1.5"x6.5" sashing to the side of the block

Block C

Block C

  •  Sew the 1.5"x6.5" sashing to the side of the 3.5"x6.5" rectangle
  • Press seam toward darker fabric
  • Sew the 1.5"x2.5" sashing to the bottom of the 2.5"x3.5" rectangle
  • Press seam to the darker fabric
  • Sew the 2.5" square to the other side of the sashing on the 2.5"x3.5"
  • Press seam toward darker fabric
  • Sew this piece to the other side of the sashing on the 3.5"x6.5" piece
  • Press seam toward darker fabric
  • Sew the 1.5"x6.5" sashing to the side of the block

Piecing Top

Overview of boy's quilt

Randomly layout the finished blocks into 5 rows by 7 columns.

Sew the blocks in each column together so you have five columns of seven blocks.

Press the seams.

Sew sashing fabric to the side of each column, and sew the columns together.

Sew sashing to the final side.

Press all seams and sew sashing across the bottom.

Press seams.

Finishing

Back, bind and quilt your baby quilt.

I pieced the back, using the fabric provided in the packet of fat quarters which was intended as a draft dodger. I totally planned to have beige on either side of the green - I didn't just make a horrible measuring mistake that I had to cover up. I would never make such an rookie mistake.

Back of the fat quarter quilt

Red Redux

Knit scarf pattern for man

Knit scarf pattern for man

The last men's scarf pattern I wrote elicited elicited some envy, so I made another. It's a nice texture that's fast and easy to knit up. The big needles, bulkier yarn and easy to memorize pattern make this a good pattern for beginners.

Red Redux

Materials

3 skeins Plymouth Chunky Merino Superwash Color 18 (100 gr, 109 yards; 100% merino wool)

US size 10 14″ needles

Tapestry needle and scissors

Notes

The scarf is 8" wide, which is pretty wide. If you'd prefer a narrower scarf, you can reduce the width by 4 stitch increments.

K- knit

P – purl

Left Twist - (LT) - knit into the second stitch, then knit into the first, slip both stitches off the needle

Cable cast on description

mens scarf knitting pattern

mens scarf knitting pattern

Directions

Setup

Cable cast on 34 sts.

Knit three rows.

Pattern

  • Row 1: K3, *p2, LT* Repeat from * to * until final 3 sts, k3.

  • Row 2: K3, *p2, k2* Repeat from * to * until final 3 sts, k3.

  • Rows 3 & 4: Repeat rows 1 & 2

  • Row 5: K to end

  • Row 6: K3, p to final 3 sts, k3

  • Row 7: K3, *LT, p2* Repeat from * to * until final 3 sts, k3.

  • Row 8: K3, *k2, p2* Repeat from * to * until final 3 sts, k3.

  • Rows 9 & 10: Repeat rows 7 & 8

  • Rows 11 & 12: Repeat rows 5 & 6

Repeat pattern until scarf measures 60″, or you run low on yarn.

Knit three rows.

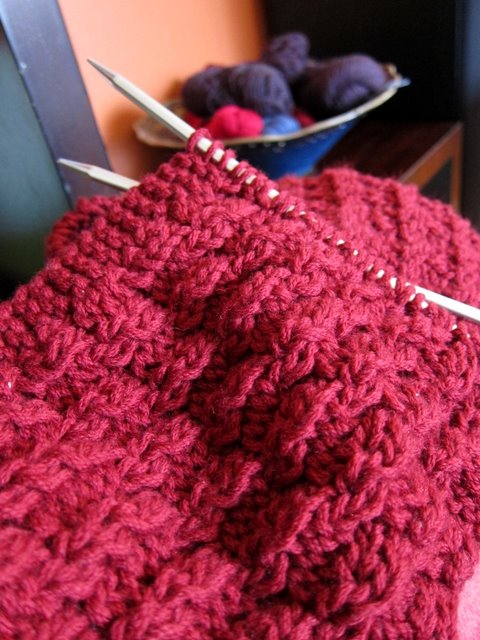
Scarf texture

Scarf texture

Men's Scarf Pattern

Men's Scarf Pattern

I like to pretend that I'm a selfish knitter, meaning I only knit for the 'knit-worthy' - those that would both help you move a body and truly understand the craft and time and love that go into hand-knits (and quilts, for that matter). The idea rose as a backlash against that jerk acting like they are doing you a favor by requesting that you make them something and that other jerk that informs you that you can buy socks already made at Walmart. Very helpful.

[img:1]

I lack the discipline to be 'selfish' and instead foist projects that took me days, weeks, months on completely unsuspecting people. The obvious amount of energy that goes into the projects lays there like threat - reject this and you reject me. It's gift-giving emotional one-upping. "Oh, it's no big deal. I just spent 30 hours working on this, stitch by stitch. Thinking about what you'd like. Fretting that you wouldn't want this. Reflecting on how you're important in my life. Nothing major. It's no Best Buy gift card or anything."

It's a bit unfair, really, because even I would rather get the Best Buy gift card. My interest in wearing the things I make dies about four days after I complete them. Perhaps, the truly selfish approach is to leach inspiration from those around me, so I can induldge in a hobby I enjoy while pretending I'm giving a one-of-a-kind masterpiece that will be cherished for decades.

This emotional bombing is not too dissimilar, in fact, from foisting my navel-gazing posts upon readers just coming here for free scarf pattern to knit for a man in their life (or lady, I suppose). So, with only a little more adieu, here we go -

This pattern was the request of an old friend to replace a scarf I'd made him years and years ago, when I'd just started knitting/crocheting. I have always been a little 'meh' about that scarf (though apparently he loved it - always a sign of the knit-worthy) so I jumped on this as an opportunity to redeem myself. His request was "long, dark red and textured". It all fell into place from there. Red yarn that just happened to be named "Pagoda" when he'd just so happened to spend some time in China and a stitch pattern that just so happened to look like roof tops, and here we are - Mao's Little Red Scarf.

This pattern is ridiculously easy and a pretty quick knit for a scarf. You need to know how to knit, purl, cast on and cast off, so it is very beginner friendly. 

Mao's Little Red Scarf Pattern

[img:2]

Materials

2 skeins Malabrigo Worsted weight in Pagoda (100 gr, 210 yards; 100% merino wool)

US size 8 14" needles

Tapestry needle and scissors

Stitch marker

Notes

K- knit

P - purl

PU - pick up strand from 2 rows down and slip it over the next live stitch. (You don't work this stitch. It is held into a point by the live stitches)

Cable cast on description

Directions

Setup

Cable cast on 35 sts. 

Knit five rows.

Pattern

  1. *K3, slip next 5 sts with yarn in front*, repeat from * to * until last 3 sts, k3.
  2. *K3, p5*, repeat from * to * until last 3 sts, k3.
  3. K5, *pu, k8, repeat from * to * until last 6 sts, pu, k6.
  4. *K3, p5*, repeat from * to * until last 3 sts, k3.

Repeat pattern until scarf measures 60" or length desired.

K 5 rows.

Bind off and weave in ends.

Optional: Ship to Asia.

[img:3]


Pucker Up Cowl Free Knitting Pattern

Materials

1 skein Cascade Yarn Rustic (79% Wool, 21% Linen) 100gr, 196 yds

32" size 7 circular needles

Tapestry needle and scissors

Stitch marker

Notes

Make pucker: Pick up stitch from 10 rows below and knit together with one stitch on the left needle.

Seed stitch: K1, p1 for the whole round. (On the second round, you'll knit into purl stitches, and purl into knit).

Slip marker as you come to it.

Cable cast on description

Directions

Setup

Cable cast on 125 sts. Join, being sure not to twist.Place marker to note start of round.

Work 1 inch in seed stitch.

Knit 10 rounds.

[img:1]

How to Resize a Quilt Pattern

Following someone elses' patterns will only get you so far in life and quilting. Knowing how to take what someone else has put forward and bend it to your whims opens you up to a ton of potential. Here's my rough guide for how to resize a quilt pattern to the dimensions you want. All you need is a calculator, scrap paper and a smidge of determination.

A note of warning: This won't work with all quilt patterns, but should work for the majority of patchwork designs.

A note of encouragement: Math isn't scary. Your high school math teacher was.

To resize a pattern, you need to decide the following:

  • What size do you want the quilt to be?
  • Do you want to change the number or the size of the blocks? (changing the number is easier)


What size quilt do you want?

Before you can resize the pattern, you need to know how big you want it to be.

Below are roughly the quilt dimensions I use. No one is going to get bent out of shape if you make the sides a little longer or shorter. And if they do, I recommend smiling and backing away from the crazy slowly and with no sudden movements.

This site has more information about quilt sizes.


Mattress

Quilt Dimensions (WxL)

Crib 32" x 54"
Twin 68" x 86"
Full 86" x 86"
Queen 90" x 90"
King 100" x 90" 


Fun with Math

The above measurements are for the full quilt top, but usually quilt pattern will have borders. We need to get to the dimensions of the center pieced part by removing the borders. You can change how thick you want the borders to be on the new quilt, but make sure to account for that.

Old Pattern

Width of completed quilt:______ (A)
Length of completed quilt: ______ (B)

Width of all borders: ______ (C)

Width of center block: A-C=______ (D)

Length of center block: B-C=______ (E)

New Pattern

Desired width of completed quilt:______ (a)
Desired length of completed quilt: ______ (b)

Width of all borders: ______ (c)

Width of center block: a-c=______ (d)

Length of center block: b-c=______ (e)

You will need the length and width numbers of the center sections later, so note them down.


Do you want to change the size or the number of blocks?

If you want to change a quilt's size, you can do so by adding additional blocks or by creating the same number of blocks, but adjusting their size. Decide which you'd prefer and do one of the following. I, personally, prefer changing the number of blocks, because it's less complicated to scale the pattern.


I want to change the number of blocks

This is pretty basic math: How long do you need each side to be/size of the blocks.

You should have the length and width of pieced section in fields (d) and (e) above. Divide each by the block size and round to the nearest block. If the pattern doesn't specify the dimensions of the finished block, make one and measure it. Reduce each side by .5" to account for seam allowance.

Example: Adding more blocks to my scrap quilt pattern

Things I can pull from the pattern:

  • Each square is 2.5" when finished (they are cut at 3"-.5" seam allowances)
  • We need an even number of rows (length), because the pattern has the in color sets
  • We can have even or odd in the columns (width)
  • There are no borders, so we do not have to account for this.

Assuming I want to make this a twin size quilt, I want the sides to be as close to 68"x86" as possible (referencing the chart above).

Width: 68" (width I want) /2.5" (block size) = 27.2 blocks

Length: 86" (length I want) /2.5" (block size) = 34.4 blocks

Round to the nearest block, and you'd need 27 blocks across by 34 rows (or seventeen 2-row color stripes) long


I want to make the same number of different sized blocks

Scaling the blocks works if you want the quilt to be the same proportions, but a different size. It would not work to scale a twin size quilt to queen, because a queen is square, whereas a twin is rectangular.

To resize the blocks, you need to resize each piece's calculations. You can end up with some off measurements (5/8th of an inch instead of 1/4th), so I only recommend this if you're comfortable with math and good at solving issues as they arise. They will.

In order to do this, you need to determine how much larger you want the pieced center to be as a percentage, and then cut each piece that percentage larger, excluding the seam allowance.

Example: Enlarging the blocks in my scrap quilt pattern

 This quilt is 36"x48". Let's say I want it to be 54" wide.

First, determine the percent increase: (new dimension)/(old dimension) 36/54=1.5 or 150% It needs to be the same percentage in both directions. Therefore the length will be 48"x1.5= 72" for a finished dimension of 54"x72".

Next, resizing the blocks: This pattern is actually easy, because there isn't much piecing. You will remove the seam allowance (.5") from the size of block the pattern tells you to cut, multiply that by the percentage you want to change the block's size, and add back in the seam allowance.

((pattern's sizes to cut - .5" seam allowance) x percentage increase) + .5" seam allowance

 Or, using the pattern's numbers, 3" cut blocks - .5" for seam allowance = 2.5" x 1.5 (the increase) = 3.75" (new finished block size) + .5" seam allowance = 4.25"

You'd cut 4.25" squares, and the blocks will be 3.75" after being sewn. You'd use the same number of blocks and placement as the pattern originally called for.


Get more fabric

Determining how much more fabric you need for the resized quilt is a tutorial in itself. I'm not going to go into it here, but here are some resources:


Triple check your math before cutting

No, really. Check it. Maybe a fourth time for luck.

Questions? Anything I have wrong?